Scene Construction

When you glance left at the Cockpit, you'll see a set of discs with 3D shapes floating in front of them. This is the Shapes Panel, and the buttons can be used to add objects to the scene. Currently you can add Primitives like Spheres or Cubes, and also Pivot objects, which are orange spheres with sticks coming out of them. You can see this panel in the image on the right.
If you double-click on one of these icons with the left mouse button, or either the left or right Touch trigger, the associated primitive will be added to the scene. It will be placed at the origin and set to a default size. Note that if there was already an object at the origin, the primitive may appear inside it.

You can also press-drag-release on these icons to place a primitive an an arbitrary location in the scene. As you move the cursor, a ray-intersection with the scene objects and ground plane is computed and the primitive is positioned at the intersection point. If the hit point lies on an object, the primitive will be aligned with the surface normal at the hit location.
To delete an object, place the cursor over the object you want to delete, and then use the right mouse button or right trigger to summon the radial popup menu, and select the Delete option.
Active Primitive

If you single-click with the left mouse button or a Touch trigger on any of the Primitives in this panel, you will notice a small star icon moves to that primitive, as shown to the right. This star indicates that this is the active primitive. The current active primitive is used in some Tools, like the Draw Primitive tool. As you might expect, Draw Primitive will create instances of the Active primitive when you use it.
Object Selection
Simplex has the standard concept of "selected objects", just like most other 3D tools. Selection lets the system know you want to do something more involved with that object(s). For example, the various object transformation controls will automatically appear when an object is selected.
To select with the mouse, simply left-click on the object. To change selection left-click on another object, and to clear the active selection, left-click on the background. You can also multi-select with shift+left-click.
With the gamepad, you similarly select and de-select with the left-trigger. Since we don't have hotkeys, we use the A button as a multi-select modifier. Hold down A while left-trigger-clicking to add or remove objects from the selection set.
With Oculus Touch you can change select with either the left or right triggers. To multi-select, you must first select an initial object, then press and hold one trigger while and then make additional selections with the other trigger. This is explained in more detail in the Oculus Touch Controls section.
Grab & Move Gesture
The precise way to move objects around is using the 3D manipulation gizmos explained in the next section. However, if you are using Oculus Touch, you can also use a fast Grab interaction that will allow you to reposition objects just by moving your hands. This is explained in more detail in the Oculus Touch Controls section.
Moving Things Around
When you select an object in Simplex, we add one or more 3D widgets to the scene which you can interact with to manipulate the object. We call this collection of widgets a Gizmo. For example the default Transform Gizmo is shown to the right, and it is composed of 10 widgets. Click-dragging on each widget applies a different constrained 3D transformation to the object.

Currently there are three Gizmos available - Transform, Snap-Drag, and Edit Primitive. You can change the active Gizmo type using the toggle-button set in the Cockpit, which you'll see if you glance down and to the left. Below these buttons are a pair of toggle buttons for the Frame Type, which can be either World or Local. We'll explain these in more detailed below.
Transform Gizmo

The Transform Gizmo is just like the 3-axis manipulators you might be familiar with from other 3D tools. Each component of the Gizmo applies a transform to the object. The three Translation Axis widgets allow you to translate the object along those axis. The three Rotation Arc widgets allow you to rotate around the axis perpendicular to the arc (ie around the translation axis with the same color). The three triangle-shaped Translation Plane widgets allow you to apply a constrained translation in the respective plane. And finally the Uniform Scale widget at the center allows you to change the size of the object.
By default the Transform Gizmo axes are aligned with the Local coordinate system of the object. So, for example, with a Cylinder primitive, the Y axis (colored Green, because RGB green is (0,1,0), which is also the positive Y axis) points along the length of the cylinder. When the Frame Type is set to World, however, the Gizmo will instead be aligned to the axes of the underlying Scene coordinate system. When multiple objects are selected, the World frame axes are always used.
Transforming Around a Pivot
click to enlarge
By default the Transform Gizmo is placed at the origin/center of the selected object, or if multiple objects are selected, at the average position of the selected object centers. However you can also use any Pivot object as the transformation frame. Simply right-click or right-trigger on the desired Pivot while the the Transform Gizmo is active, and select Use Frame in the radial popup.
The transformation frame will then shift to the position and axes inherited from the Pivot (see image to the right, in below-left quadrant). Now transformations are applied to the selected objects relative to the active Pivot.
Snap-Drag Gizmo
The Transform Gizmo is useful for careful, precise transformations. However if you want to quickly assemble an object, they are quite tedious, and require some expertise. A more efficient alternative is the Snap-Drag Gizmo. With this tool active, when you select an object a set of automatically-generated Pivot-like objects will appear. You can "snap" these pivots to other Pivot objects in the scene by left-click/left-trigger-drag. When you perform this interaction, the selected object will transformed so that the pivots are coincident and then the primitive will be re-oriented so it is aligned with the target Pivot frame, as shown in the images below.
You can adjust the behavior of Snap-Dragging using the Frame Type toggle. If you set the frame type to World, then the snapping will only be translational, the selected object will not be rotated.

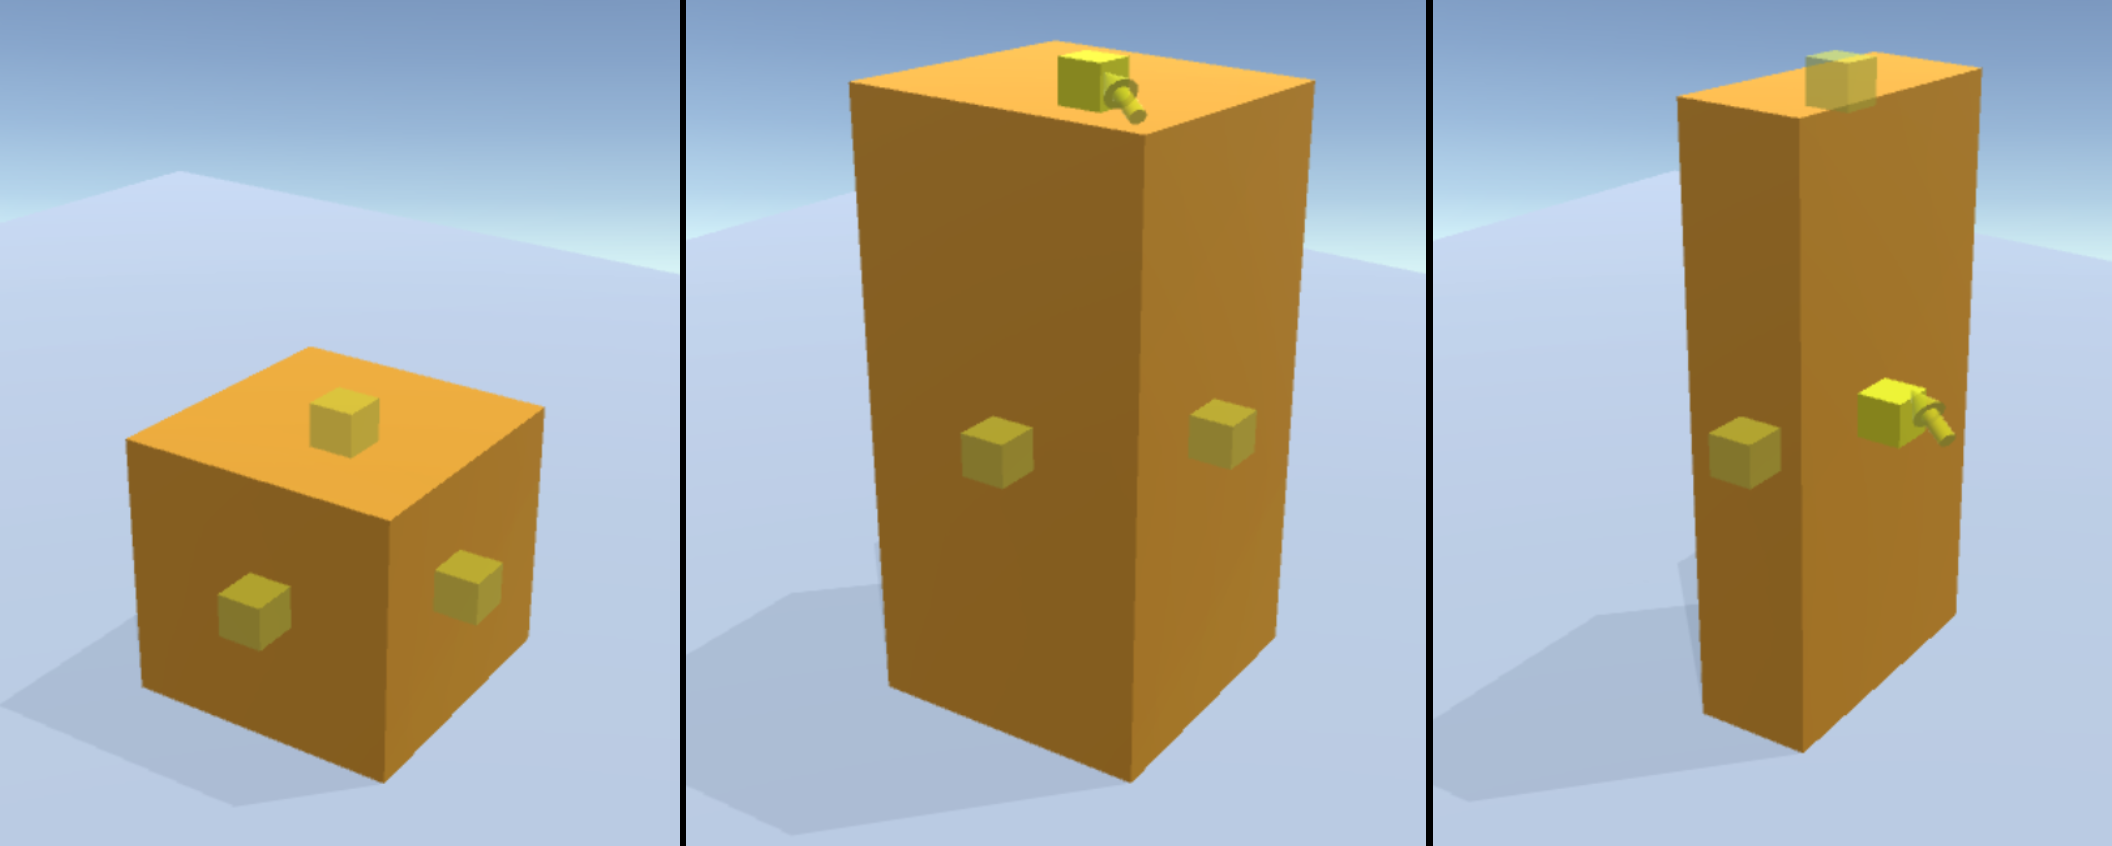
Edit Primitive Gizmo
The third available Gizmo is the Edit Primitive Gizmo, which you can use to modify parameters of the parametric primitives like Cylinders and Boxes. Currently we only support a few parameters for each primitive, controlling linear dimensions like Radius and Height. When you select an object a set of boxes will appear, each of these is a handle you can click-and-drag on. An example is shown below.